When we walked into the cozy café / baking school called The Mixing Bowl, I knew immediately that my family was in for an intimate treat. The cute café off Hollywood Road on Shin Hing Street in Sheung Wan was inviting and charming, with delectable baked goods tempting us in display cases before we even started our macaron lesson ahead. Kyle, the founder of The Mixing Bowl, greeted and ushered us (cautiously — watch your head up the staircase!) up to a pleasant kitchen above the café.
We entered a meticulous space that was thoughtful and thorough in its organisation, with a large group worktable in the middle for the beginner chefs to huddle around. The shelves around the wall are loaded with ingredients and cooking supplies, aprons hanging from hooks ready for use and large canisters filled with baking ingredients. The three ovens are mammoth for HK standards. There’s a stove top, a stocked fridge and a nice large sink with a window to look out on the alley while washing up. Basically, the entire kitchen is a cook’s dream: literally, Kyle’s dream.
Kyle, along with partner Victor, is co-founder of The Mixing Bowl. Initially, Kyle’s career started as a schoolteacher, which helps explain his skill in guiding his students in baking and cooking. During our short time with Kyle, I could tell he was a passionate individual. His enthusiasm is contagious — we dove right into learning how to make macarons, trusting our teacher completely. He has a very patient way and had an eye on all four of us, guiding each of us in the way we needed. I found this part remarkable: from negotiating with my 12 year old to encouraging my husband, Kyle knew how to individually reach us so that we’d succeed in our tricky task of making macarons!
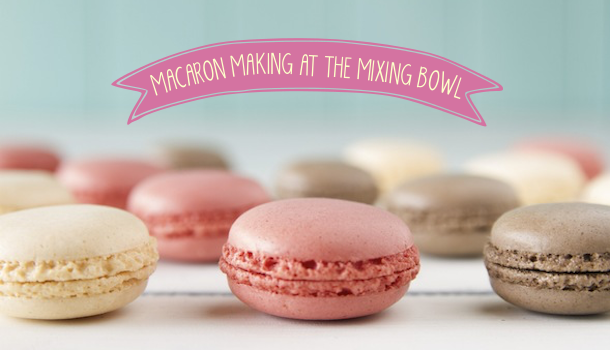
Actually, with Kyle’s instructions, macarons are not so tricky to make—they just take a lot of patience. There are many steps (detailed below), and the timing of each step must be perfect. If the egg mixture gets overbeat, well, then you won’t have macarons! Kyle compared the intricacies of making macarons to chemistry: the process must be exact and any fluctuation in ingredients or discrepancy in mixing will ruin your creation. Luckily, Kyle had a keen eye on each of us, so all our macarons turned out great!
There is plenty of wait time during the macaron making process as well: we were really impressed how Kyle handled the down time with us. For one, we ate delicious scones with clotted cream while we waited for our macarons to set (they have to sit and reduce their air for at least 13 minutes).
While the macarons were baking we played Guesstures — in the kitchen, there’s a whole shelf filled with games for the passing of time during any cooking and baking stalls. We also listened to our instructor: he has had such an interesting life. Kyle grew up on a farm in Canada where EVERYTHING was homegrown, home cooked and homemade. Much of all he learned was from his grandmother, and he started to help out in the kitchen at the young age of 8. No wonder he wants to empower children! Learning about our nutrition — how and what we put in our mouths is a valuable life lesson to be learned at a young age.
The Mixing Bowl not only offers cooking classes on items from scones to gnocchi, but also offers week-long courses that are even more diverse. The students not only learn to cook various recipes but also create an ingredient list, head to the market for purchases, and prep any food items (like a chicken for example!). During the summer season, these courses run during the day; however in the midst of the school year, the courses run after school — just in time for dinner! Booking individual classes for parties is also an option; I can envision my 11 year old daughter requesting a cupcake session for her next birthday. The kitchen is big enough for classes of 10-12 students, but I liked the intimacy of our group of four. We received individual attention, but I have a hunch Kyle would succeed at making all students feeling empowered. We had such a great time learning how to make macarons but also just hanging out with a really cool teacher/chef!
The Mixing Bowl’s Recipe for Macarons
Makes: 20 Macaron Shells
Ingredients:
Macarons
1 medium egg white, aged for at least 24 hrs (35-36g)
15g caster sugar
40g ground almond
65g icing sugar
few drops of food colouring (optional)
Chocolate Ganache:
70g dark chocolate
30g double cream
You will also need:
1 baking sheet/baking tray, lined with baking paper and a piping bag.
Directions:
Macaron Filling / Ganache:
1. In a pan, bring the double cream to a boil.
2. Remove from the heat, add the chocolate and stir until completely melted. Leave to cool.
3. Put mixture in the fridge until it is firm enough for piping. You can also whip the cooled mixture to create a softer and fluffier mixture.
Tip: To make a green tea and white chocolate ganache, replace the dark chocolate with white chocolate and add 1/4 teaspoon of matcha powder (more if desired).
Macaron Shells:
1. Blitz the ground almond and icing sugar in a food processor for 30-60 seconds. Then sift the mixture into a bowl and set aside. Discard any big chunks of ground almond.
2. Also weigh out the caster sugar in a separate bowl and set aside.
3. Beat the egg whites Bain-Marie style for 20 seconds until the whites become just warm and fluffy.
4. Beat the egg whites with a hand held mixer until it forms soft peaks, sprinkle the caster sugar on the egg whites and continue to whisk until it is shiny and forms stiff peaks. You can at this point add a few drops of food colouring. Do not overwhisk the egg whites, it will break down eventually and become grainy.
5. Using a spatula, gently fold in the almond and icing sugar mixture in 4-5 additions. Mix until the mixture is well incorporated before adding each addition. When you are done, the mixture should be soft – when you lift some mixture up with the spatula it should fall off easily.
6. Transfer the mixture into a piping bag. You are now ready to pipe the mixture into individual macaron shells.
7. Place the tip/nozzle perpendicular and close to the baking paper, apply pressure until the mixture spreads out to your desired size, stop applying the pressure, then remove the tip/nozzle in a small and quick circular motion. This will avoid forming a top/point shell. You may also use the template provided with this recipe.
8. Tap the entire tray on the table 3-4 times to smooth out the surfaces. Carefully slide the baking paper off the baking tray and let the shells rest on the table for 30-45 minutes to allow a skin to form on top.
9. Put a baking tray/sheet in the oven and preheat the oven to 150C. When ready, take the pre-heated tray out and carefully slide the baking paper onto the tray. (Using a hot tray will help the macaron shells cook underneath and create the perfect macaron shape.)
10. Bake at 150C for 10 minutes, turn oven off and let the macarons sit in the oven for another 3-4 minutes. (Note: All ovens are different, you can test if the shells are done by touching them with your finger – if it is hard and doesn’t jiggle about it’s done.)
11. Allow the shells to cool completely on a cooling rack before sandwiching with the filling.
The Mixing Bowl, No. 5, Shin Hing Street, Sheung Wan, [email protected], 2524 0001
 View All





 View All


 View All


 View All
