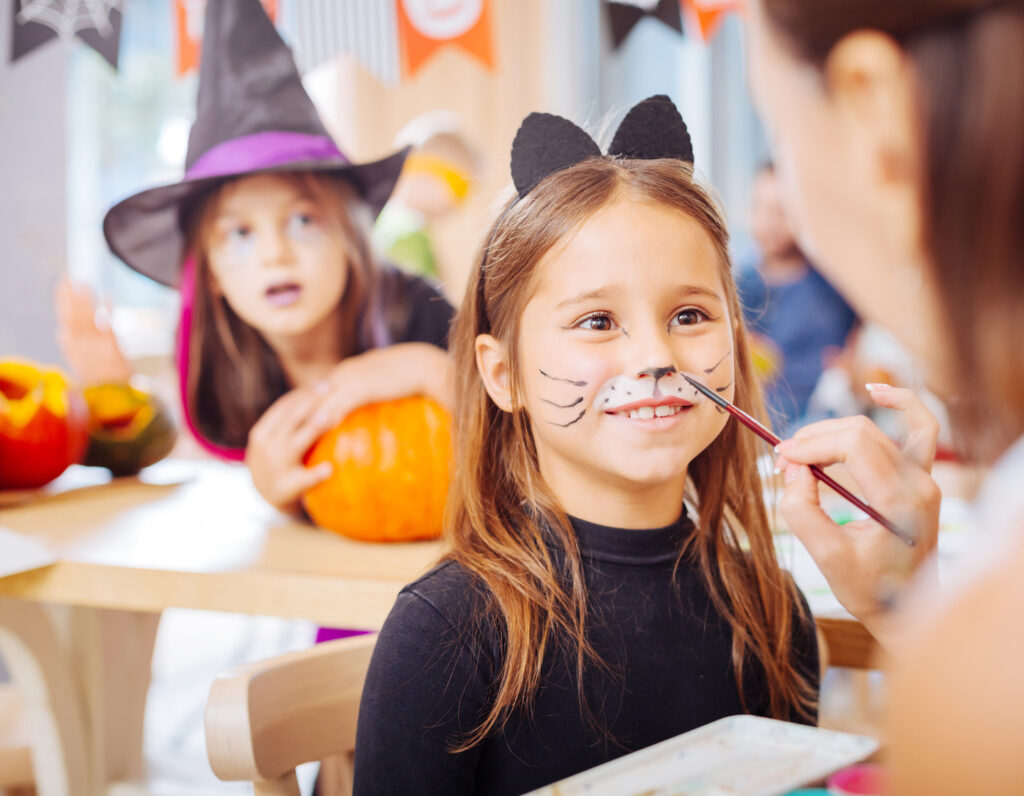
Get creative with your Halloween face paint and help transform the kids this Halloween! It might just be the easiest way to add some extra oomph to your costume.
Halloween is just around the corner (can you believe it’s that time of the year again?)! If you’ve left things until the last minute or are still desperately looking through your phone for some Halloween face paint inspiration, then look no further. Create these DIY-Halloween looks for the littles, we’ve even included step-by-step instructions for you to follow along!
Read More: 5 DIY Kids’ Halloween Costumes That Won’t Break The Bank
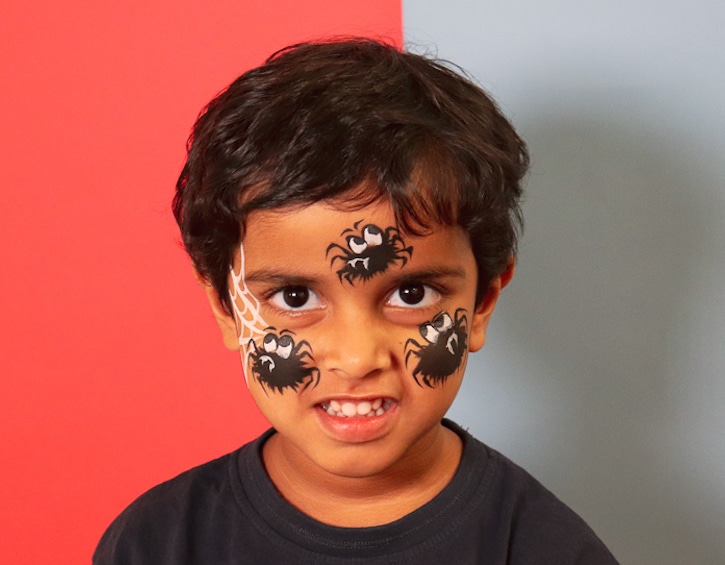
Halloween Face Paint — Spider
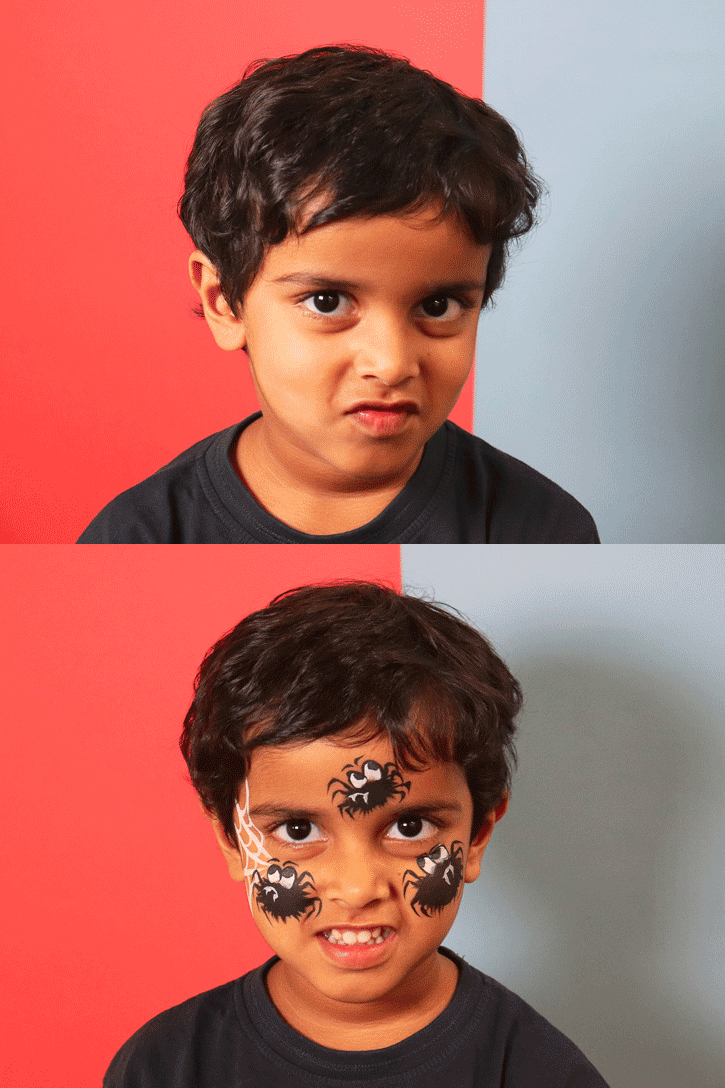
This look only requires black and white face paint- so is perfect if you have limited colours in your kit. You’ll also need a sponge and a small brush. Always remember to rinse your brush with water before switching colours to prevent them from mixing.
- Begin by creating the spider’s web. Wet your white paint with water from a spray bottle and use a small tapered brush to swirl and mix the paint and water together. Once you have a smooth consistency, use the brush to draw diagonal lines from the temple to the cheek.
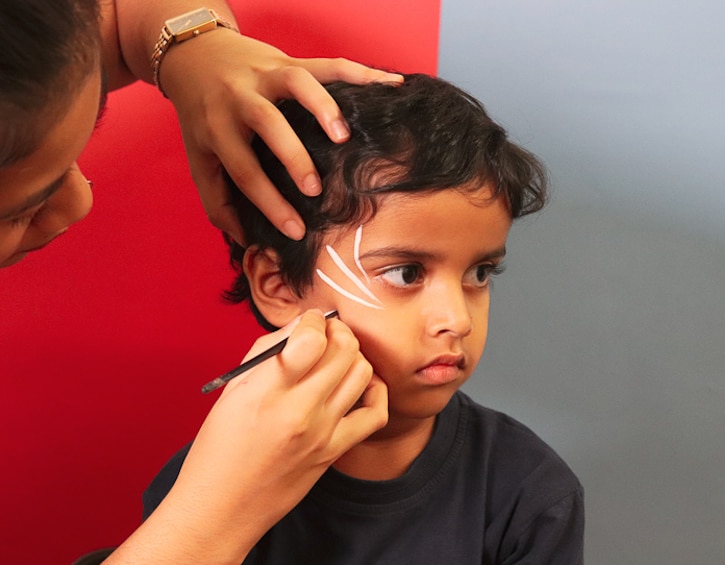
- Repeat three more times, with each new line equidistant from each other.
- With the same brush and white paint, create the backward letter “Cs” in between the diagonal lines. And there you have your web!
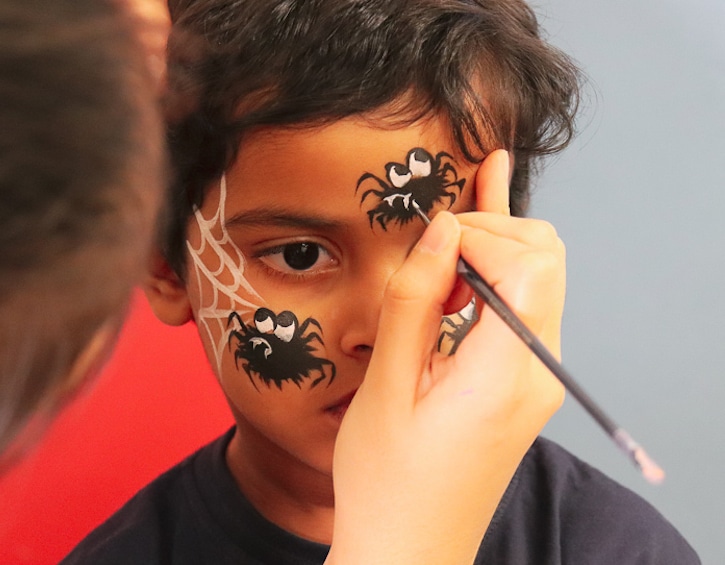
- Next, clean your brush and use it to pick up some black paint to begin the outline of the spiders. First, draw an oval on the cheek with enough distance from the web. Repeat ovals on the other cheek or wherever you prefer. You can get creative by alternating the size and number of spiders you draw!
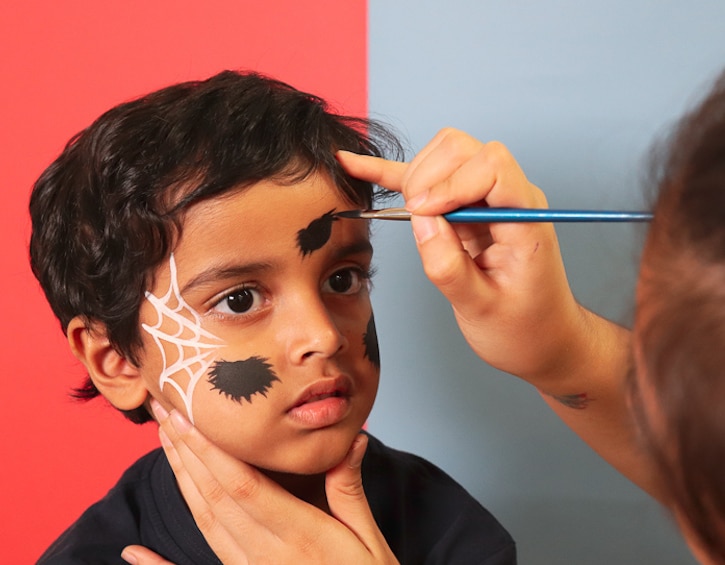
- Fill in the ovals with the black paint and use quick outward flicking motions around the edges to give the spider some fuzz. Just remember to leave some space at the top centre for you to add eyes later.
- Add eight pointed legs to each body.
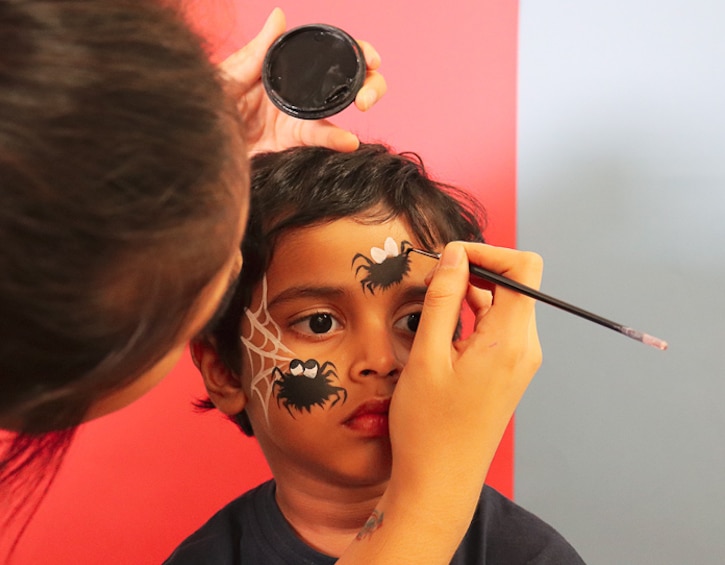
- For the face of the spider, use white paint to draw two circles on top of each body – these will be the eyes. Then, once this paint is dry, use some black to draw on smaller circles for the iris. Then outline the eyes and add some eyebrows.
- Complete the look with small white lines for the mouth and fangs!
Read More: 11 Hilarious Halloween Costumes For Kids
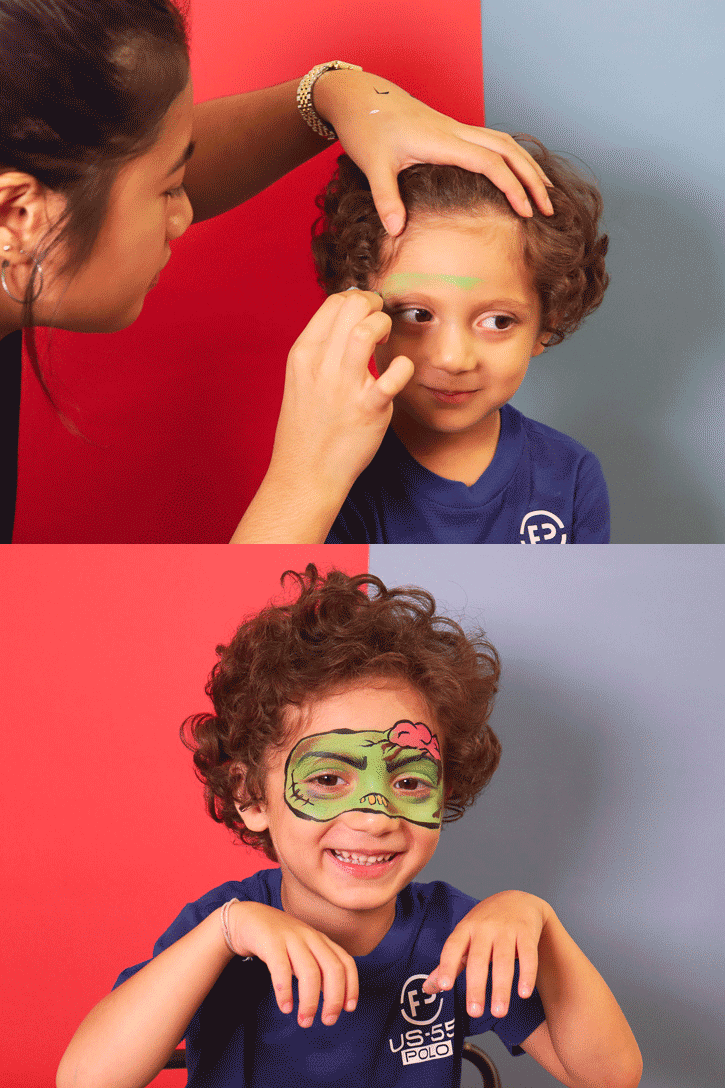
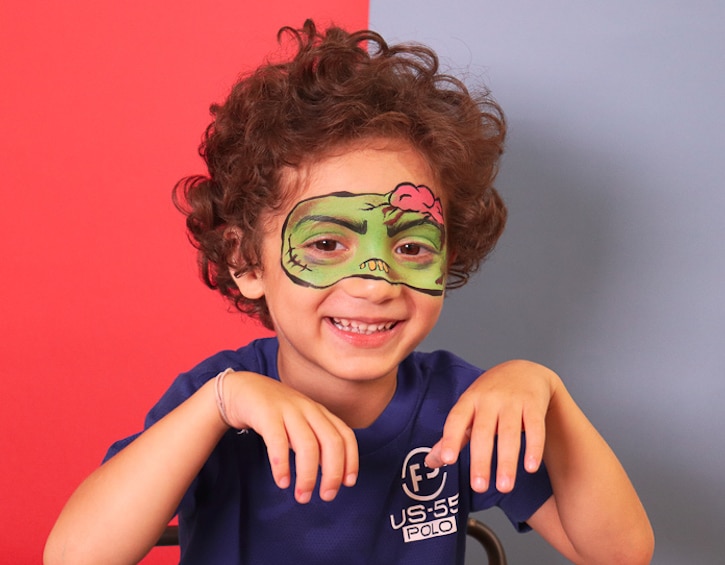
Halloween Face Paint — Zombie
For this look, you’ll need a sponge, a small brush and some green, brown, red, purple, black and white paint.
- Start with the base by picking up some green paint on your brush. Then outline an oval across the top half of the face to form the zombie’s head.
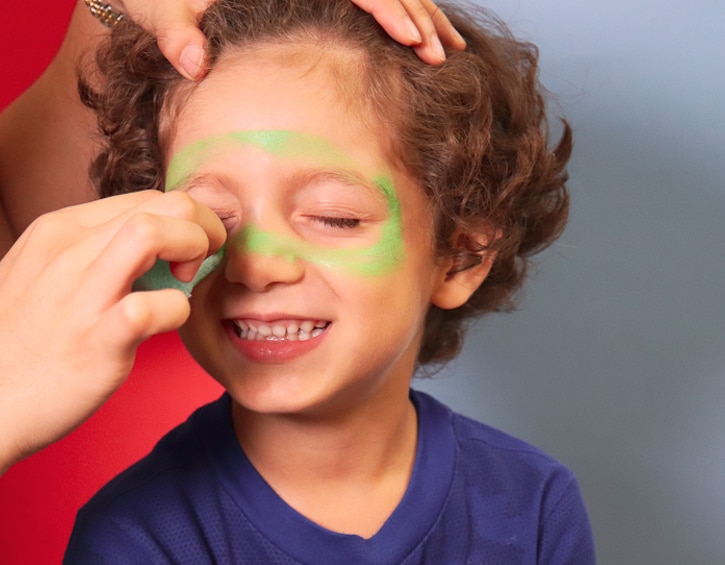
- Fill in the outline, using the same colour, with your sponge.
- To give the zombie a slightly muddy look, clean your sponge and dab it into some brown paint. Wipe the excess colour off on a towel and add several spots onto the face. Repeat these steps using the colour purple.
- Then use your brush, and the same purple colour, to give your zombie some bags under its eyes.
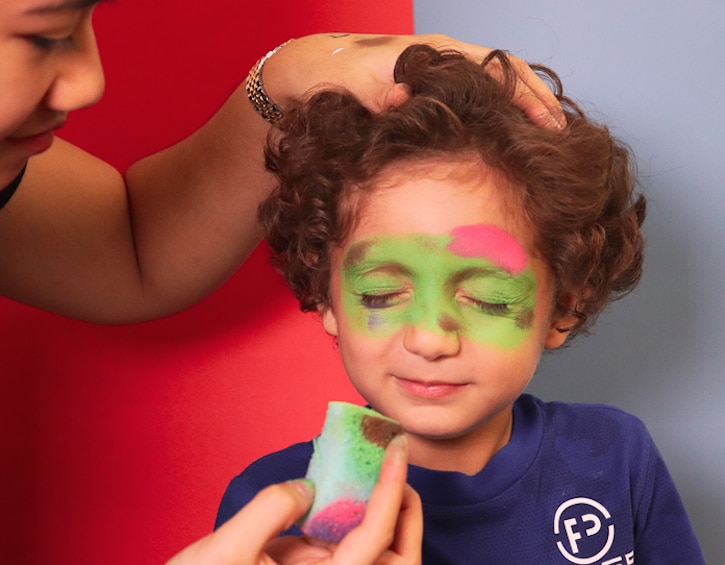
- Now mix some red and white paint together to create a pink colour, and use this to paint a cloud-like shape (this will be its brain) anywhere on top of the zombie’s head.
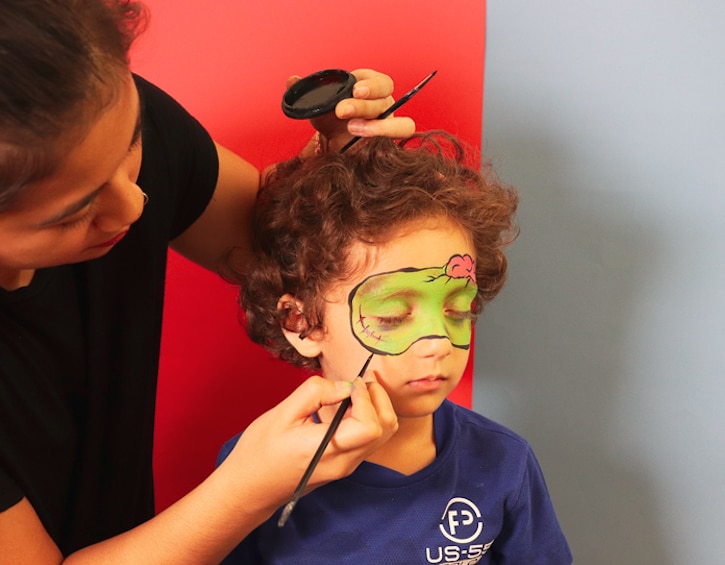
- Then use your small brush and some red and black paint to create little scar stitches along the face, by drawing one long line with a few short lines across it. Also, use the small brush and black paint to outline everything and add some detail to the brain.
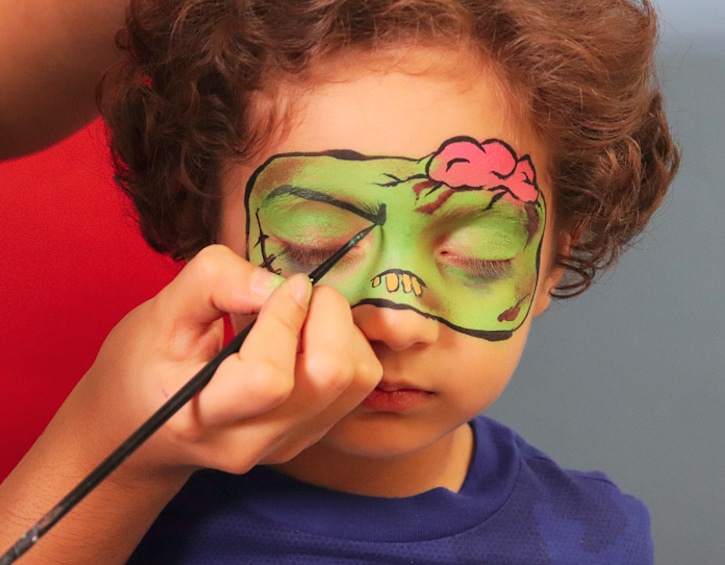
- To clean up the look, continue to use the small brush to draw on some angry eyebrows. Don’t forget the mouth, which sits on the nose (so that your kids can still eat Halloween gummies without messing up their look!), by drawing on a frown and using white paint to create some crooked teeth!
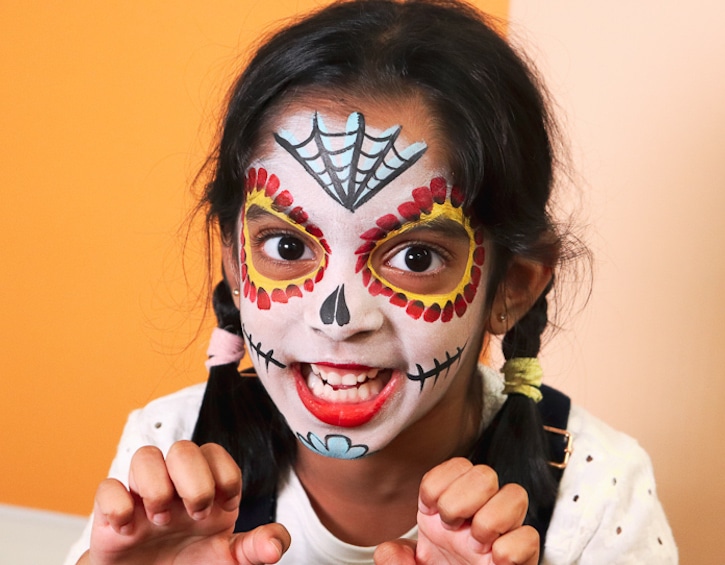
Halloween Face Paint — Sugar Skull
You can use any colours you choose for this look – we used red, yellow, white, blue and black. Again you’ll need a sponge and a small brush, plus a slightly thicker, tapered brush.
- Begin by outlining the eye socket with yellow. Don’t worry, it doesn’t need to be a perfect circle – start from the inner brow, drawing diagonally upwards (following the shape of your kid’s eyebrows). At the end of the eyebrows, draw around the outer socket and then curve into the inner corner of the eye, before finally drawing upwards to close the outline of the socket.
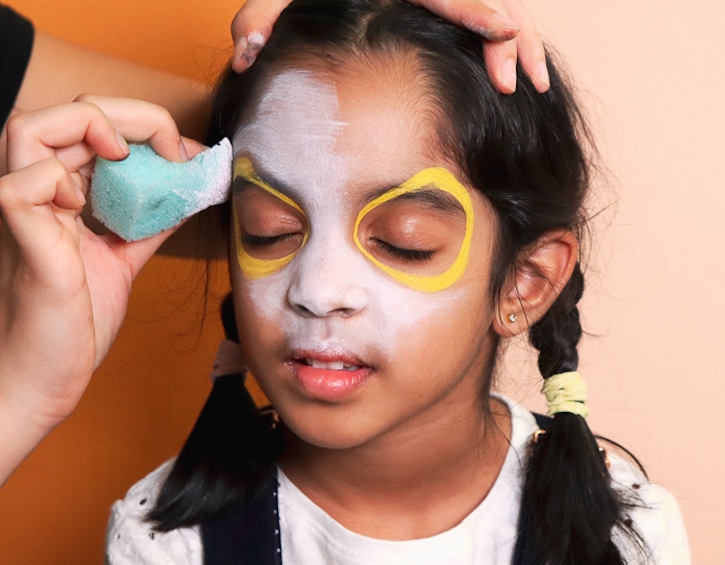
- Repeat on the other side by mirroring this method. Then use your sponge to paint the whole face white (outside the eye sockets).
- Now it’s time to create some flower petals around the eye, so load up your denser, tapered brush with red paint and dip the tip into a darker colour like black. Now you have a brush with two colours.
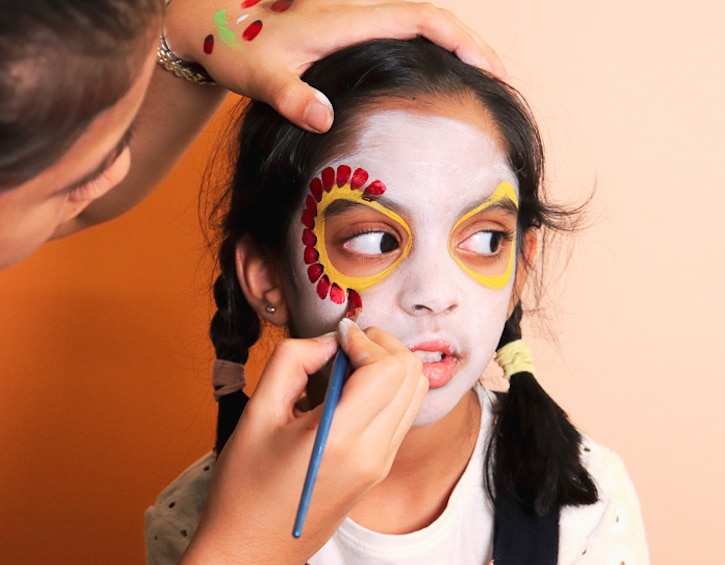
- Test this next step on your arm to practice first! Start lightly from the tip of the brush (placing it along the yellow socket outline) and gradually push down until your brush is flat. This will create a petal shape! Repeat this step all along the yellow outline around both eye sockets.
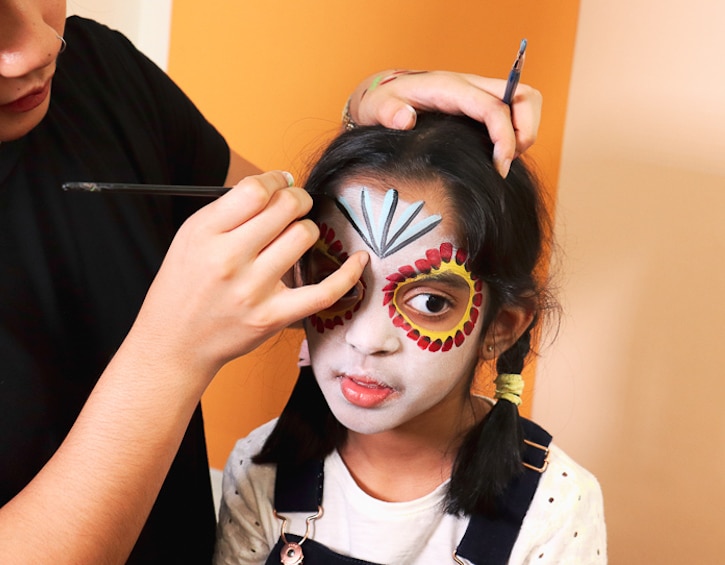
- Next, decorate the white space on the forehead and cheeks. For the forehead we made spiderwebs (using the same technique as in the spider look above), except begin the webs from the top centre of the hairline, drawing straight down to a middle point above the eyebrows. Draw five of these lines in black to meet at the same mid-point and then repeat with blue, before drawing upward facing “Cs” in between the gaps
- Now using your small brush and black paint, start from one corner of the mouth and draw a line curving slightly upwards. Repeat on other side and add a few short paint strokes across, leaving some space in between to mimic skull teeth.
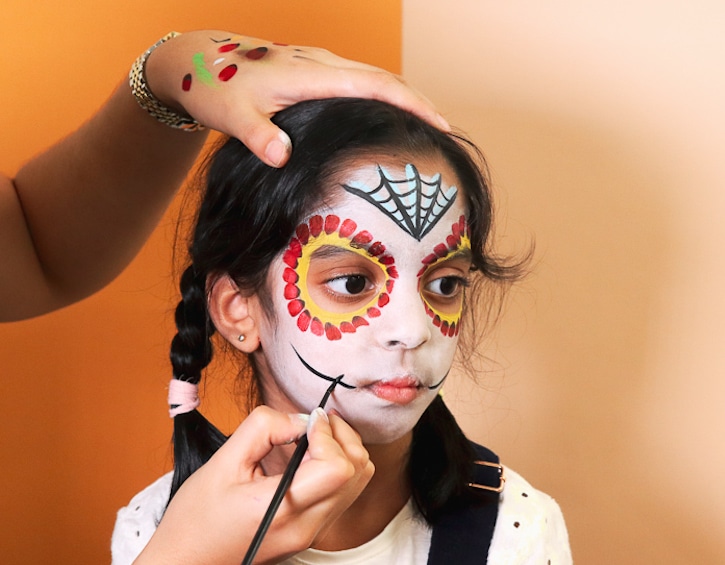
- Add some black nostrils to the bridge of the nose and draw a half flower on the chin (we used blue for this and outlined in black). Finish off the look with some red face paint or lipstick on the lips!
Halloween Face Paint — Half Skull
You’ll just need some white and black paint for this look, as well as your sponge and a small brush.
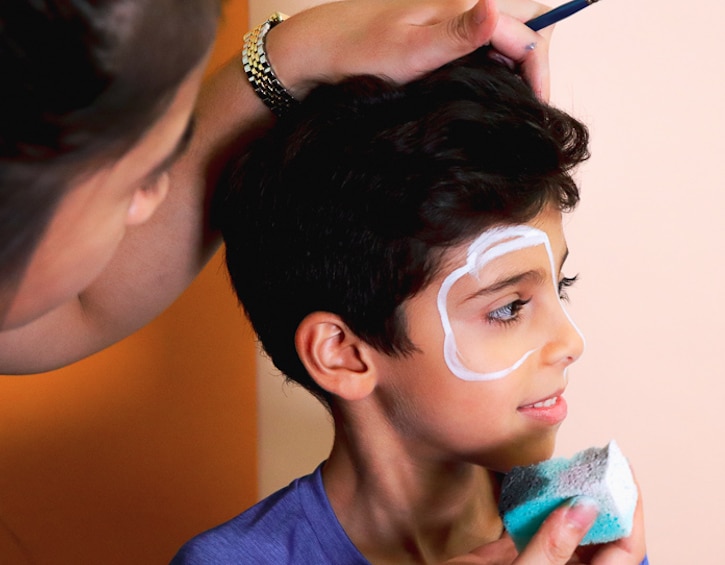
- Begin by outlining the skull shape (as in the photo below). With white paint on your brush, draw a line across starting from the front forehead, then curve slightly inwards at the temple and outwards again at the cheekbones (like a “C” shape). Continue the line back across the check to reach the nose and down to meet the corner of the upper lip. That’s the hardest part done! You can easily erase any mistakes with a wet towel if needed.
- Then mix together some white paint with a little bit of black to make grey. Use this to lightly outline the eye socket, and fill in with your sponge.
- Clean your sponge before dipping into the white paint and filling in the rest of the skull shape.
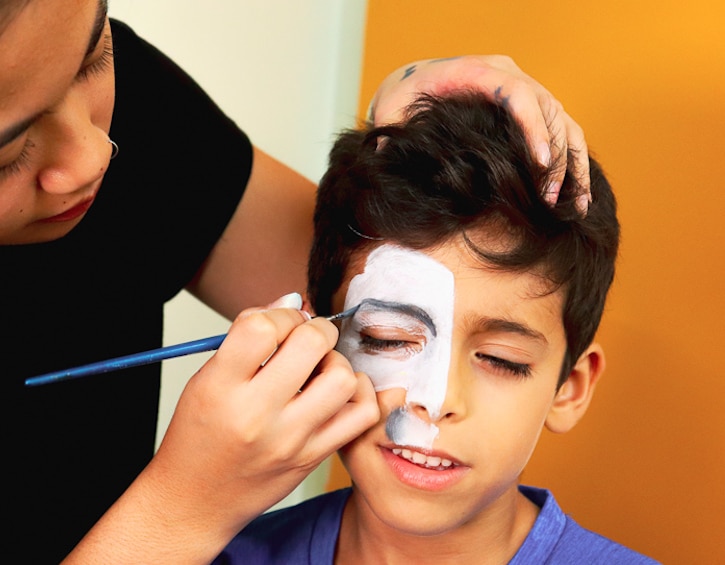
- Create a nasal hole with your brush and some black paint, drawing on a teardrop shape.
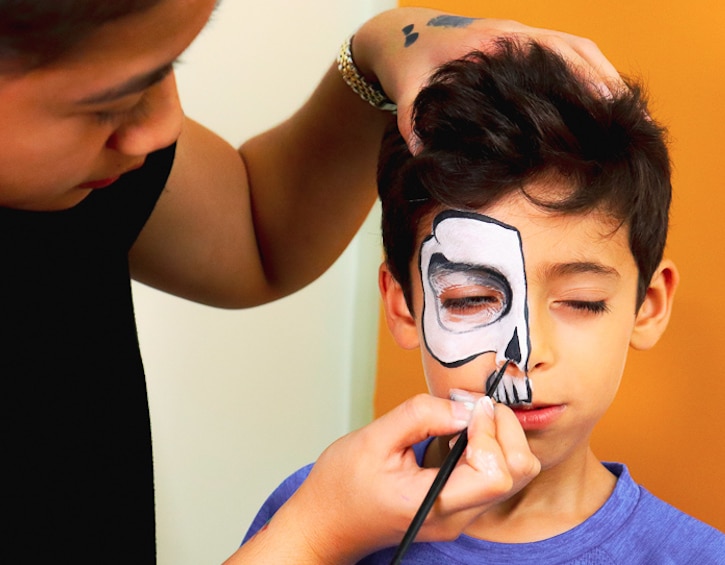
- Now you just need to outline the skull with black (i.e. the outer skull, eye sockets and teeth).
- Make your skull look a little more scary by drawing on browbones that look like diagonal “S” shapes, right above the eye sockets and your child’s natural eyebrows.
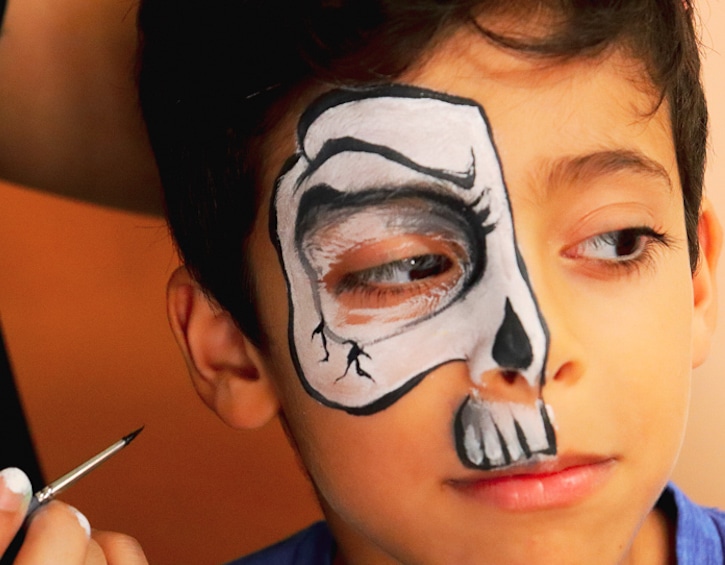
- To add some extra detail, add on cracks wherever you please! Just create messy jagged lines that look like roots.
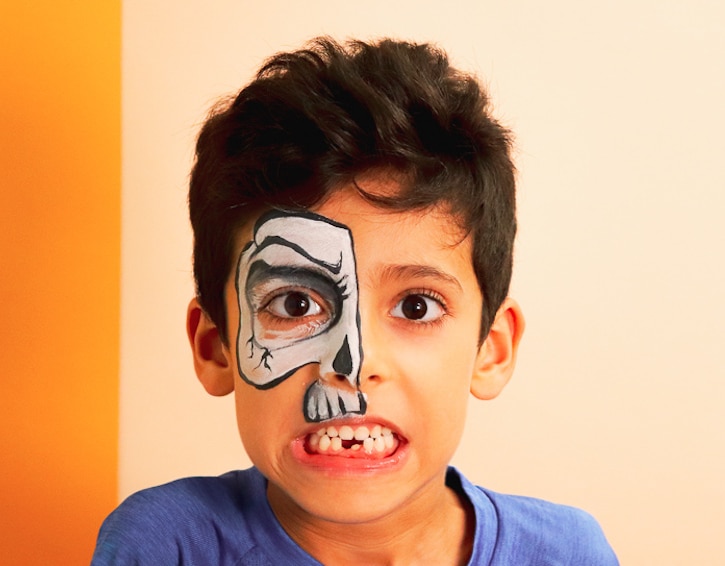
- You can easily turn this into a full skull look by mirroring the above steps on the other side.
Read More: Hong Kong Costume Stores — Where To Get Kids Halloween Costumes In Hong Kong
 View All






 View All




 View All


 View All


