DIY your household’s fashion.
It’s that time of the year again. Summer is almost here (though did it ever actually leave Hong Kong?) and it’s time to go through the wardrobe and swap seasonal clothes, donate what we don’t want anymore and, if we’re honest, be realistic about what looks good and what doesn’t. We all also have those items that have been there for a long time – you might not wear them but they still hold a special place in your heart. Whether it’s that pair of jeans we wore at our first concert or a now discoloured t-shirt that has shared many adventures with us, we simply don’t have the heart to throw them away. So instead of parting ways, why not upcycle your wardrobe instead?
There’s the environmental aspect to consider too. The average consumer, after all, throws out about 32kg of clothing every year, with 85% of all unwanted clothes ending up in landfills around the world! Rather than reaching for the trash, why not give new life to your family’s old yet beloved clothes while doing your bit for the environment with these home-style hacks.
Read more: Hong Kong Style: Five Top Mama And Daughter Looks
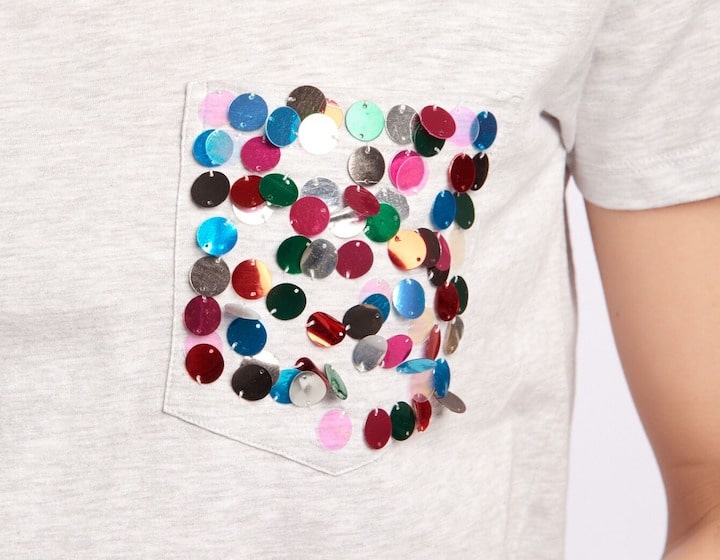
If you have a plain white T, or shirt already with a pocket that looks a bit blah, get your creative juices flowing by adding a pop of colour or a new pattern.
You’ll Need:
- A plain T-shirt or shirt with a pocket
- Thread and needle
- Scissors
- Colourful fabric/patterns/lace/sequins
- A measuring tape
- Ball pins
- A marker or tailor chalk
How To:
- Use the tape to measure the length and width of your pocket and draw a rough shape on your fabric of choice.
- Cut the pocket shape and apply it on top of your pocketed t-shirt. Use pins to secure it.
- Sew it all around the pocket of your t-shirt.
- A new look is made!
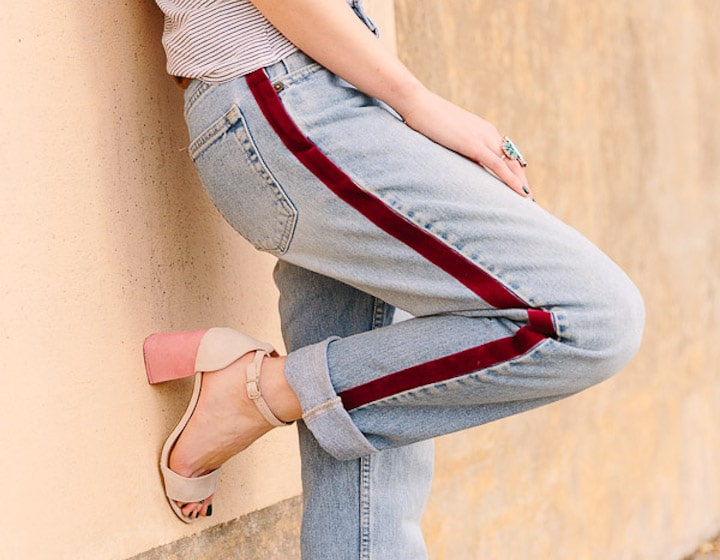
Upcycle your beloved pair of jeans or pants that have seen better days with this on-trend racer stripe from Paper & Stich that’s easier to put together than it looks.
You’ll Need:
- A pair of jeans or trousers
- 1-inch wide velvet ribbon or fabric of your choice (2-3 yards depending on how long your pants are)
- Heat bond iron-on adhesive tape (1/2 inch to 3/4 inch wide)
- Straight pins
- Thin scrap piece of cloth
- Iron
How To:
- Prepare your trousers by ironing them, and leave the iron nice and hot for later on.
- Layout your jeans flat and start working on one leg. Begin working at the top of the waistband and pin the iron-on-tape and the velvet ribbon to the trousers’ leg. To keep things straight, follow the seam line.
- Once the stripe has been placed all the way down, position a thin piece of fabric over the velvet ribbon (so the velvet won’t suffer from the heat) and press the iron down on top. To secure it more firmly, press it down with your finger first and then pass the iron over afterwards.
- When you get to the bottom of the leg, leave an extra inch at the bottom and cut off any excess. Then wrap that inch of hem tape and velvet ribbon at the bottom into the inside of the pants and secure it the same way as the rest, with heat.
- Repeat all the above steps for the other leg. Once both legs are done, pop your jeans in the washing machine but hang them out to dry, as the heat of the dryer might disturb the velvet ribbon overtime.
- That’s it! Enjoy your new trendy jean makeover. Why not do the same for the kids as well?
Check out Paper & Stitch for full images on how to get this style.
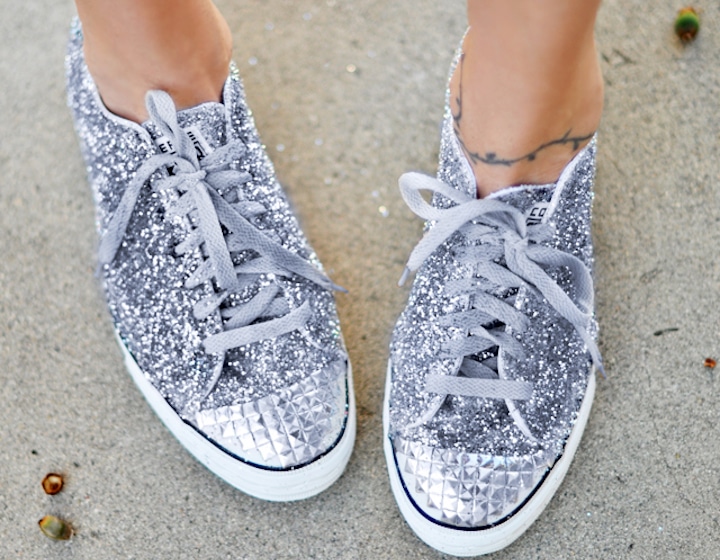
Shoes occupy a special place in a lot of mama’s hearts, especially when it comes to that special pair of sneakers that have walked us to so many special places. Why throw them away when you can upstyle instead! We love this idea from …love Meagan, and the kids will be sure to love the extra sparkle as well.
You’ll Need:
- Canvas trainers
- Fabric glue and/or Mod Podge (all-in-one glue, sealer and finish)
- Paintbrushes to apply the glue
- Silver glitter (4oz is plenty)
- Fine glitter in black
- Painter’s tape
- Iron-on silver pyramid studs (hit Sham Shui Po for inspiration)
How To:
- Prepare a large amount of glue in a plate, and tape down both sides of your sneakers by using painter’s tape. Use a paintbrush to apply a generous layer of glue to the tongue of your shoe.
- Place your sneakers on a paper cover or box (you don’t want the glitter to go everywhere!) and sprinkle a generous amount of glitter.
- Wait for the tongue to dry up and, once it’s ready, concentrate on the shoe sides. Remove the tape and apply a generous layer of glue; it dries pretty quickly, so make sure to do one side at a time.
- Sprinkle a generous amount of glitter and shake off the excess. You can mix up the silver glitter with the black glitter for a more layered effect.
- Shake off the excess and allow the glitter to settle. Add glue to any spot you missed, apply more sparkles, shake off and let dry.
- Once things are stable and solid, it’s time to concentrate on the toe. Get your metal studs ready, and apply a generous layer of glue. Make sure to act fast because it dries quickly.
- Begin by adding studs at the centre, create a T and work outwards from there.
- Apply another light coat of glue to seal the glitter, so that you won’t have to reapply more later on.
- Let everything dry, put the laces back on and enjoy the final result!
Check out …love Meagan for detailed pictures on how to create these sparkly gems.
Read more: Custom-Made Clothing: The Best Tailors And Shoemakers In Hong Kong
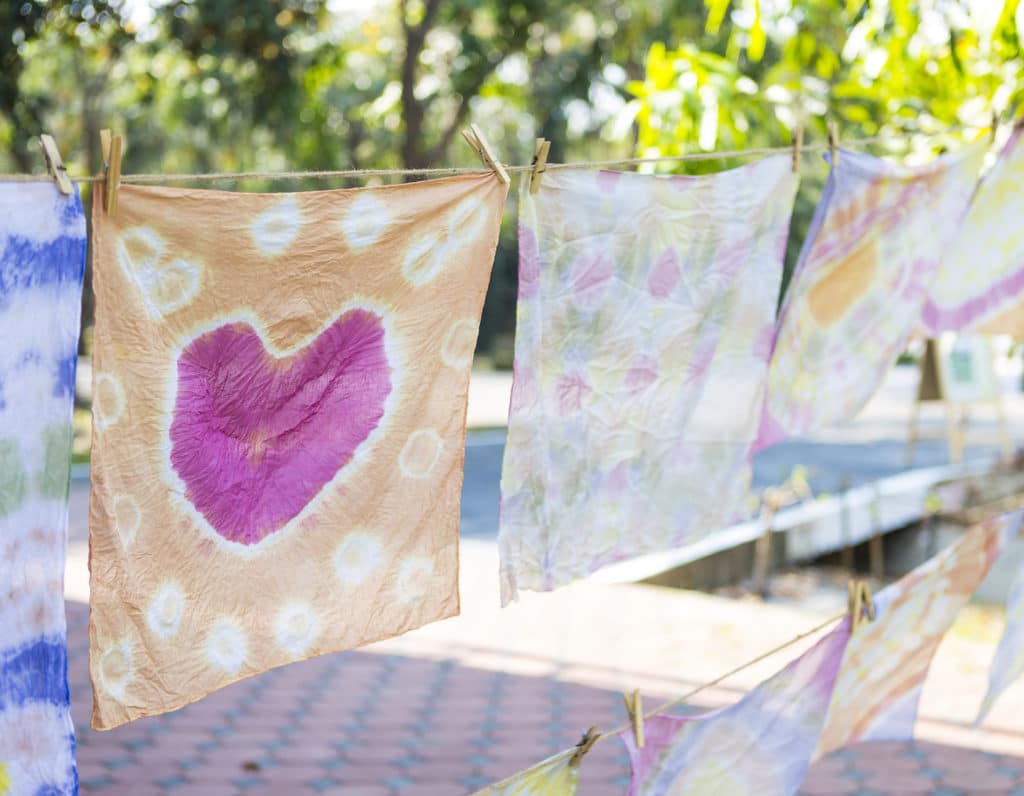
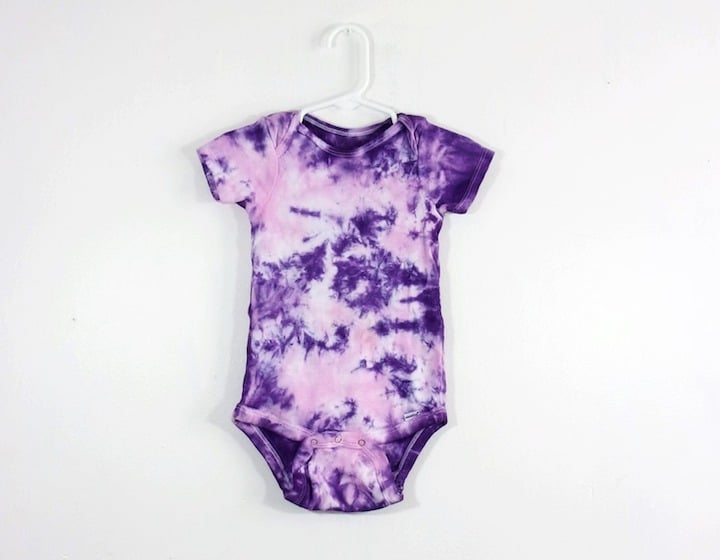
This evergreen DIY project is a great way to keep children occupied at home. Grab your old t-shirts, short, shirts or dresses (anything you want!) and give them a new lease of life.
You’ll Need:
- Clothes to tie-dye (preferably 100% cotton or linen)
- Non-toxic Tie-dye kit (like this)
- Plastic bag
How To:
- Choose a 100% cotton t-shirt and soak it in lukewarm water. Remove the excess water and lay it flat.
- Choose a tie-dye kit and follow the instructions. Most likely you’ll have to mix the colour with warm water. Add a little salt to the mixture to enhance the colour.
- Tie-dye your shirt and follow the pattern of choice with string. Don’t sweat it if it doesn’t come up exactly as expected; the best and most interesting patterns come from mistakes. Apply one colour at a time. Begin with lighter colours first, and then work your way to the darker ones. The darker tones can be layered on top of the lighter ones.
- While the shirt is tied together, place it in a plastic bag and let the colour set for 12-24 hours. Take it out sooner if you prefer a pastel shade.
- Once the time has passed, put gloves on, untie your t-shirt and rinse in cold water until the water running off is clear. Wash it in the washing machine in cold water, making sure you don’t wash anything else with it.
- Dry it out and it’s ready to wear!
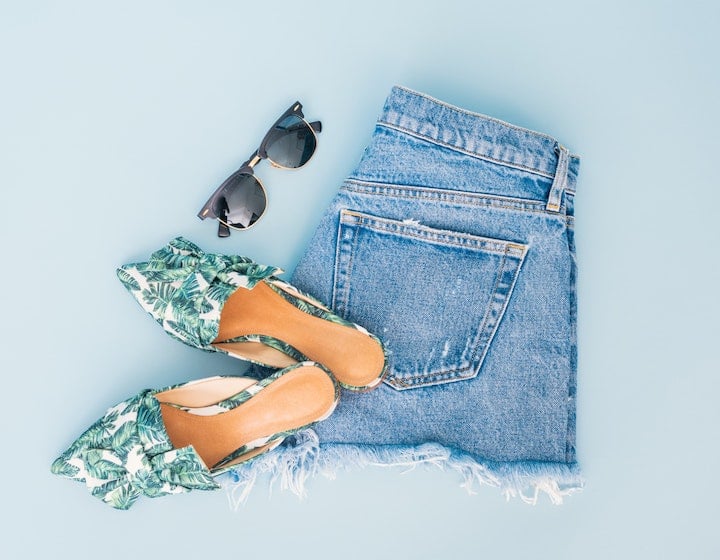
Don’t throw your jeans away just yet, upcycle instead! The impact on the environment can be – simply put – devastating. Do you know how many litres of water are needed to make a single pair of jeans? 10,000! Yes, you read that correctly. So grab your beloved comfy go-to’s and transform them into a lovely pair of shorts.
You’ll Need:
- A pair of old jeans
- A tailor’s chalk
- A good pair of scissors
- Needle and thread
How To:
- Try on your jeans and decide where you’d like to cut. Once you’ve got that, mark your hemline with the tailor’s chalk (allowing a little extra for hemming).
- Once you are happy with it, start cutting along the drawn hemline.
- Sew a stitch of about ½” or ¼” to keep the denim from over fraying. Or leave them be for a distressed, lived-in look.
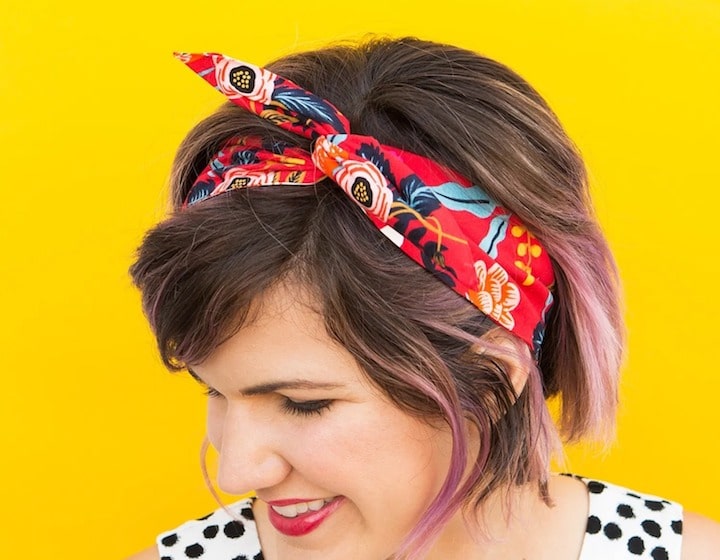
A cute look for twinning mamas and daughters, this is a very quick and easy solution for those who have leftover fabric buzzing around or to upcycle an old cotton scarf that you no longer use. With the summer heat (and humidity!) heading right for us, hacks to keep our hair in place without giving up on our look are essential. So why not make a matching headband or two? We love the red headband show in the pic from DIY lifestyle blogger Sarah Hearts. Check out her no-sew version as well.
You’ll Need:
- Colourful fabric
- Jewellery wire (and wire clippers)
- Measuring tape
- Pins
- Scissors
- A sewing machine (but you can still make a hairband by stitching it with your hands; in which case, you’ll just need a thread and needle)
How To:
- Cut a 4-inch wide strip of fabric into 30-inch lengths. (This is for a mama-sized head!)
- Fold the fabric over (with the fabric you don’t want to see on the outside) and pin along the long length.
- Sew the open side from top to bottom leaving only one end open.
- Turn the headband inside out to reveal the fabric you want to see.
- Cut a strip of metal wire several inches longer than the length of the fabric, make a loop at one end and feed that through the open end of the fabric.
- When the wire is all the way to the end, make a loop with the wire on the open end and tuck it inside the fabric, sewing the open end now closed. Enjoy your new headband!
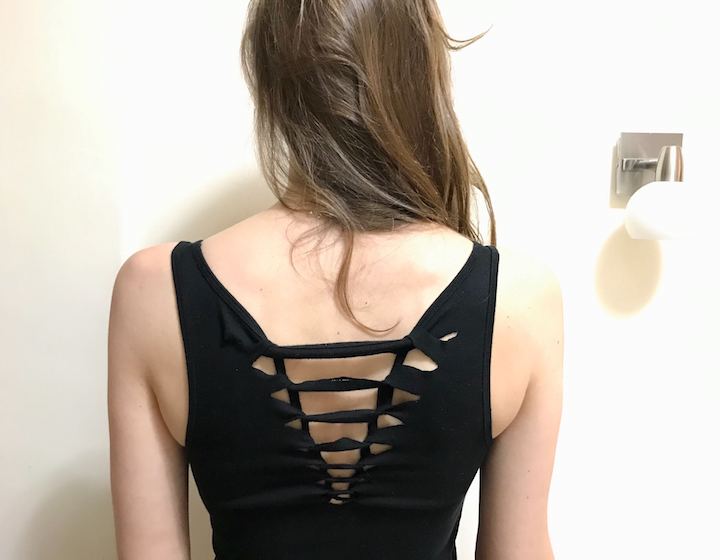
If your favourite T has seen better days but you simply can’t part with it, consider this easy and fun makeover. With no sewing required, a pair of sharp scissors is all you need! Have fun with baggy T-shirts, vest tops or even T-shirt dresses.
You’ll Need:
- On old T-shirt or top
- a pair of scissors
How To:
- Fold your old T-shirt in half lengthways so the side seams meet – the front and back panels should be folded in half on themselves.
- Starting only with the back panel, cut from the centre of the middle fold near the neckline. Cut again below leaving around an inch in between, with each strip getting shorter until the final cut is right on the fold.
- Open the T-shirt up and you should see an inverted triangle of cuts on the back panel.
- Starting with the second strip down, fold it over the strip above it making a loop, then repeat using the strip below feeding it through the new loop. Keep going until you reach the shortest strip.
- When you reach the end, cut the final strip in the middle and secure it with a knot on either side by tying it to the closest strip so it doesn’t unravel.
Read more: Where To Buy Women’s Swimwear: Hong Kong Stores And Online Sites
Featured image courtesy of Getty Images, image 1 courtesy of lolaliza, image 2 courtesy of Paper & Stich, image 3 courtesy of …love Meagan, image 4 courtesy of Crank Baby Tie Dye via Etsy, image 5 courtesy of Photo by Arnel Hasanovic via Unsplash, image 6 courtesy of Sarah Hearts, image 7 courtesy of Alex Purcell Garcia.
 View All


 View All


 View All


 View All


